
Wi-Fi Manager
Scan, join, and manage Wi-Fi networks directly from the NetFluss menu bar — without opening System Settings.
Wi-Fi Manager
Wi-Fi Manager, introduced in v2.3, brings full Wi-Fi management to the NetFluss popover. Scan nearby networks, join secured networks, pin favorites, and inspect adapter details without leaving the menu bar.
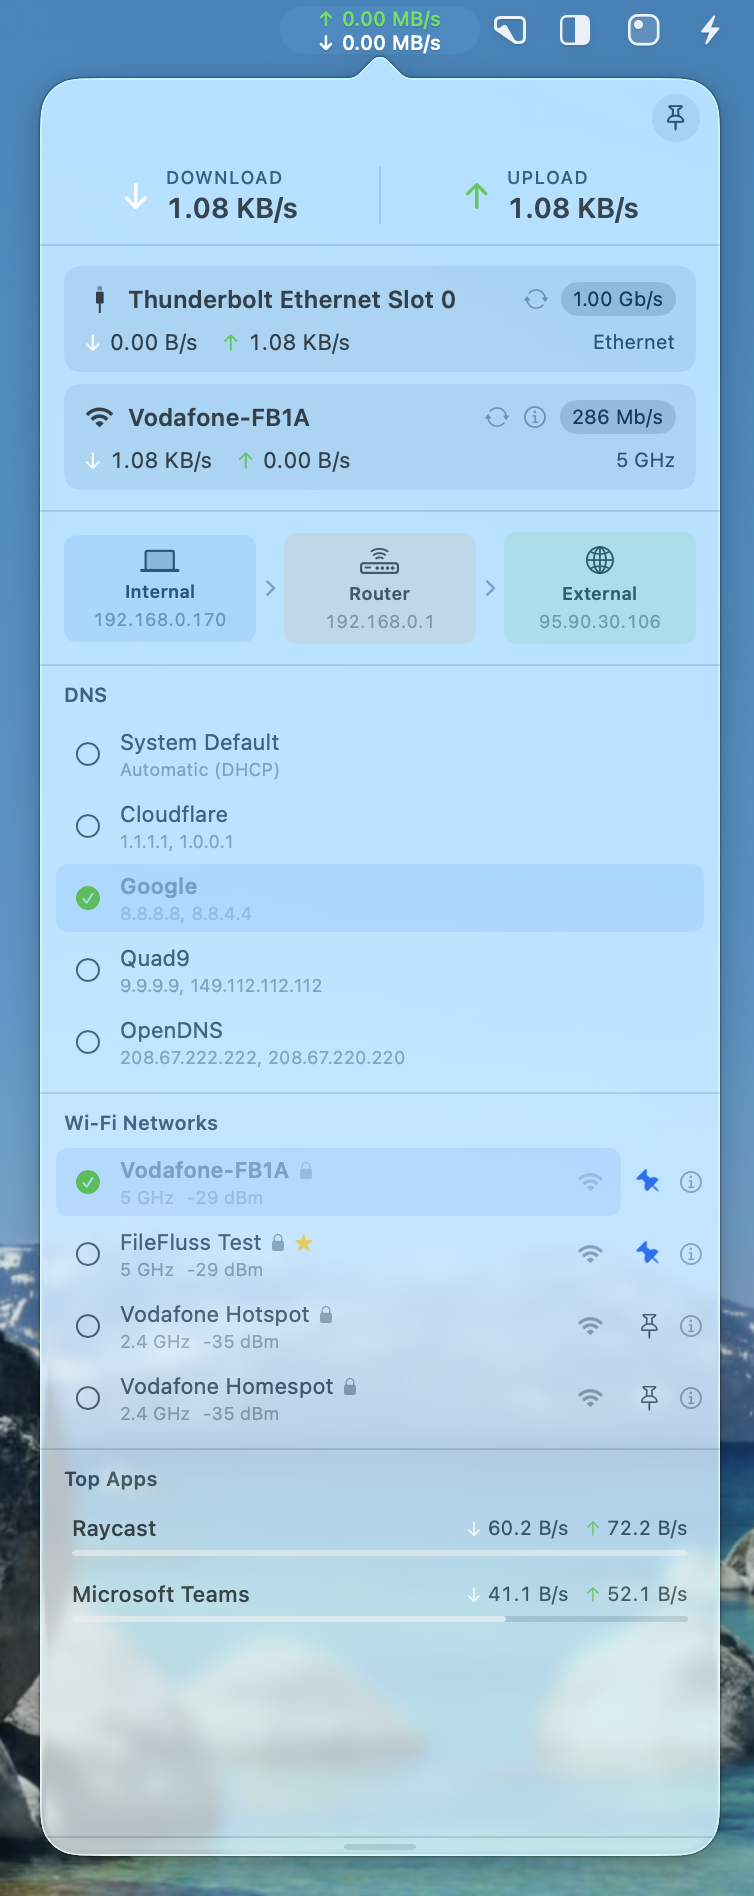
Scanning nearby networks
The popover scans nearby networks through CoreWLAN and refreshes the list every 8 seconds while it stays open. That keeps signal strength and availability current without requiring a manual refresh.
NetFluss deduplicates networks by SSID so you see one row per network name instead of multiple rows for each access point. When several BSSIDs advertise the same SSID, NetFluss keeps the strongest one, and if you are already connected, the connected BSSID always stays visible.
The list is sorted to keep the networks you care about easiest to reach. Pinned networks appear first, the connected network follows, and the remaining networks are ordered by signal strength from strongest to weakest.
Joining networks
Join a nearby network directly from the menu bar and confirm the connection before switching back to your work.
Open the NetFluss popover
- Click the NetFluss icon in the menu bar.
- Open the Wi-Fi Networks section to view nearby networks and their signal strength.
Pick a network
- Select a network from the scanned list.
- If the network is already known to macOS, NetFluss joins it silently.
- If the network is secured and not yet known, NetFluss opens a password dialog.
Enter password if needed
- Enter the network password for a new secured network.
- NetFluss saves the password to macOS Known Networks through the privileged helper so you do not need to re-enter it later.
Confirm connection
- Wait for the network row to move to the top of the list and show as connected.
- Once connected, the active network remains visible even if another access point for the same SSID has a stronger signal.
Pinning networks
Pin frequently used networks to keep them at the top of the list, even above the network you are currently using. This makes it faster to switch between home, office, hotspot, or travel networks.
If a pinned network is temporarily out of range, NetFluss still shows it as a placeholder row so it does not disappear from view. The row stays visible until you unpin it, which helps you keep your preferred list consistent.
NetFluss stores pinned SSIDs locally for your user account. Your pinned list stays available across app restarts without affecting other users on the same Mac.
Network details
Click the detail icon on any network row to open a per-network detail popover. The detail view shows the information you usually need when choosing between similar networks or diagnosing weak coverage.
You can inspect the network band, including 2.4 GHz, 5 GHz, or 6 GHz, along with the channel and channel width. The same view also shows RSSI, the security type, and the BSSID, which you can copy when you need to identify a specific access point.
Adapter details
Open the Wi-Fi adapter detail popover when you need to inspect the current connection instead of a nearby network. This view focuses on the active adapter and the link your Mac is using right now.
The adapter detail popover shows the Wi-Fi standard, such as 802.11ax or Wi-Fi 6, along with the current security protocol, channel, RSSI, noise level, SNR, ESSID, BSSID, and Tx rate. Use these values to understand connection quality and confirm which access point your Mac is actually using.
Location permission required
macOS requires Location Services access through CoreLocation for SSID scanning. NetFluss prompts for this permission the first time you use Wi-Fi Manager, and without it, network names cannot be displayed.
NetFluss uses this permission only for Wi-Fi scanning. NetFluss does not collect or transmit location data.
Wi-Fi settings
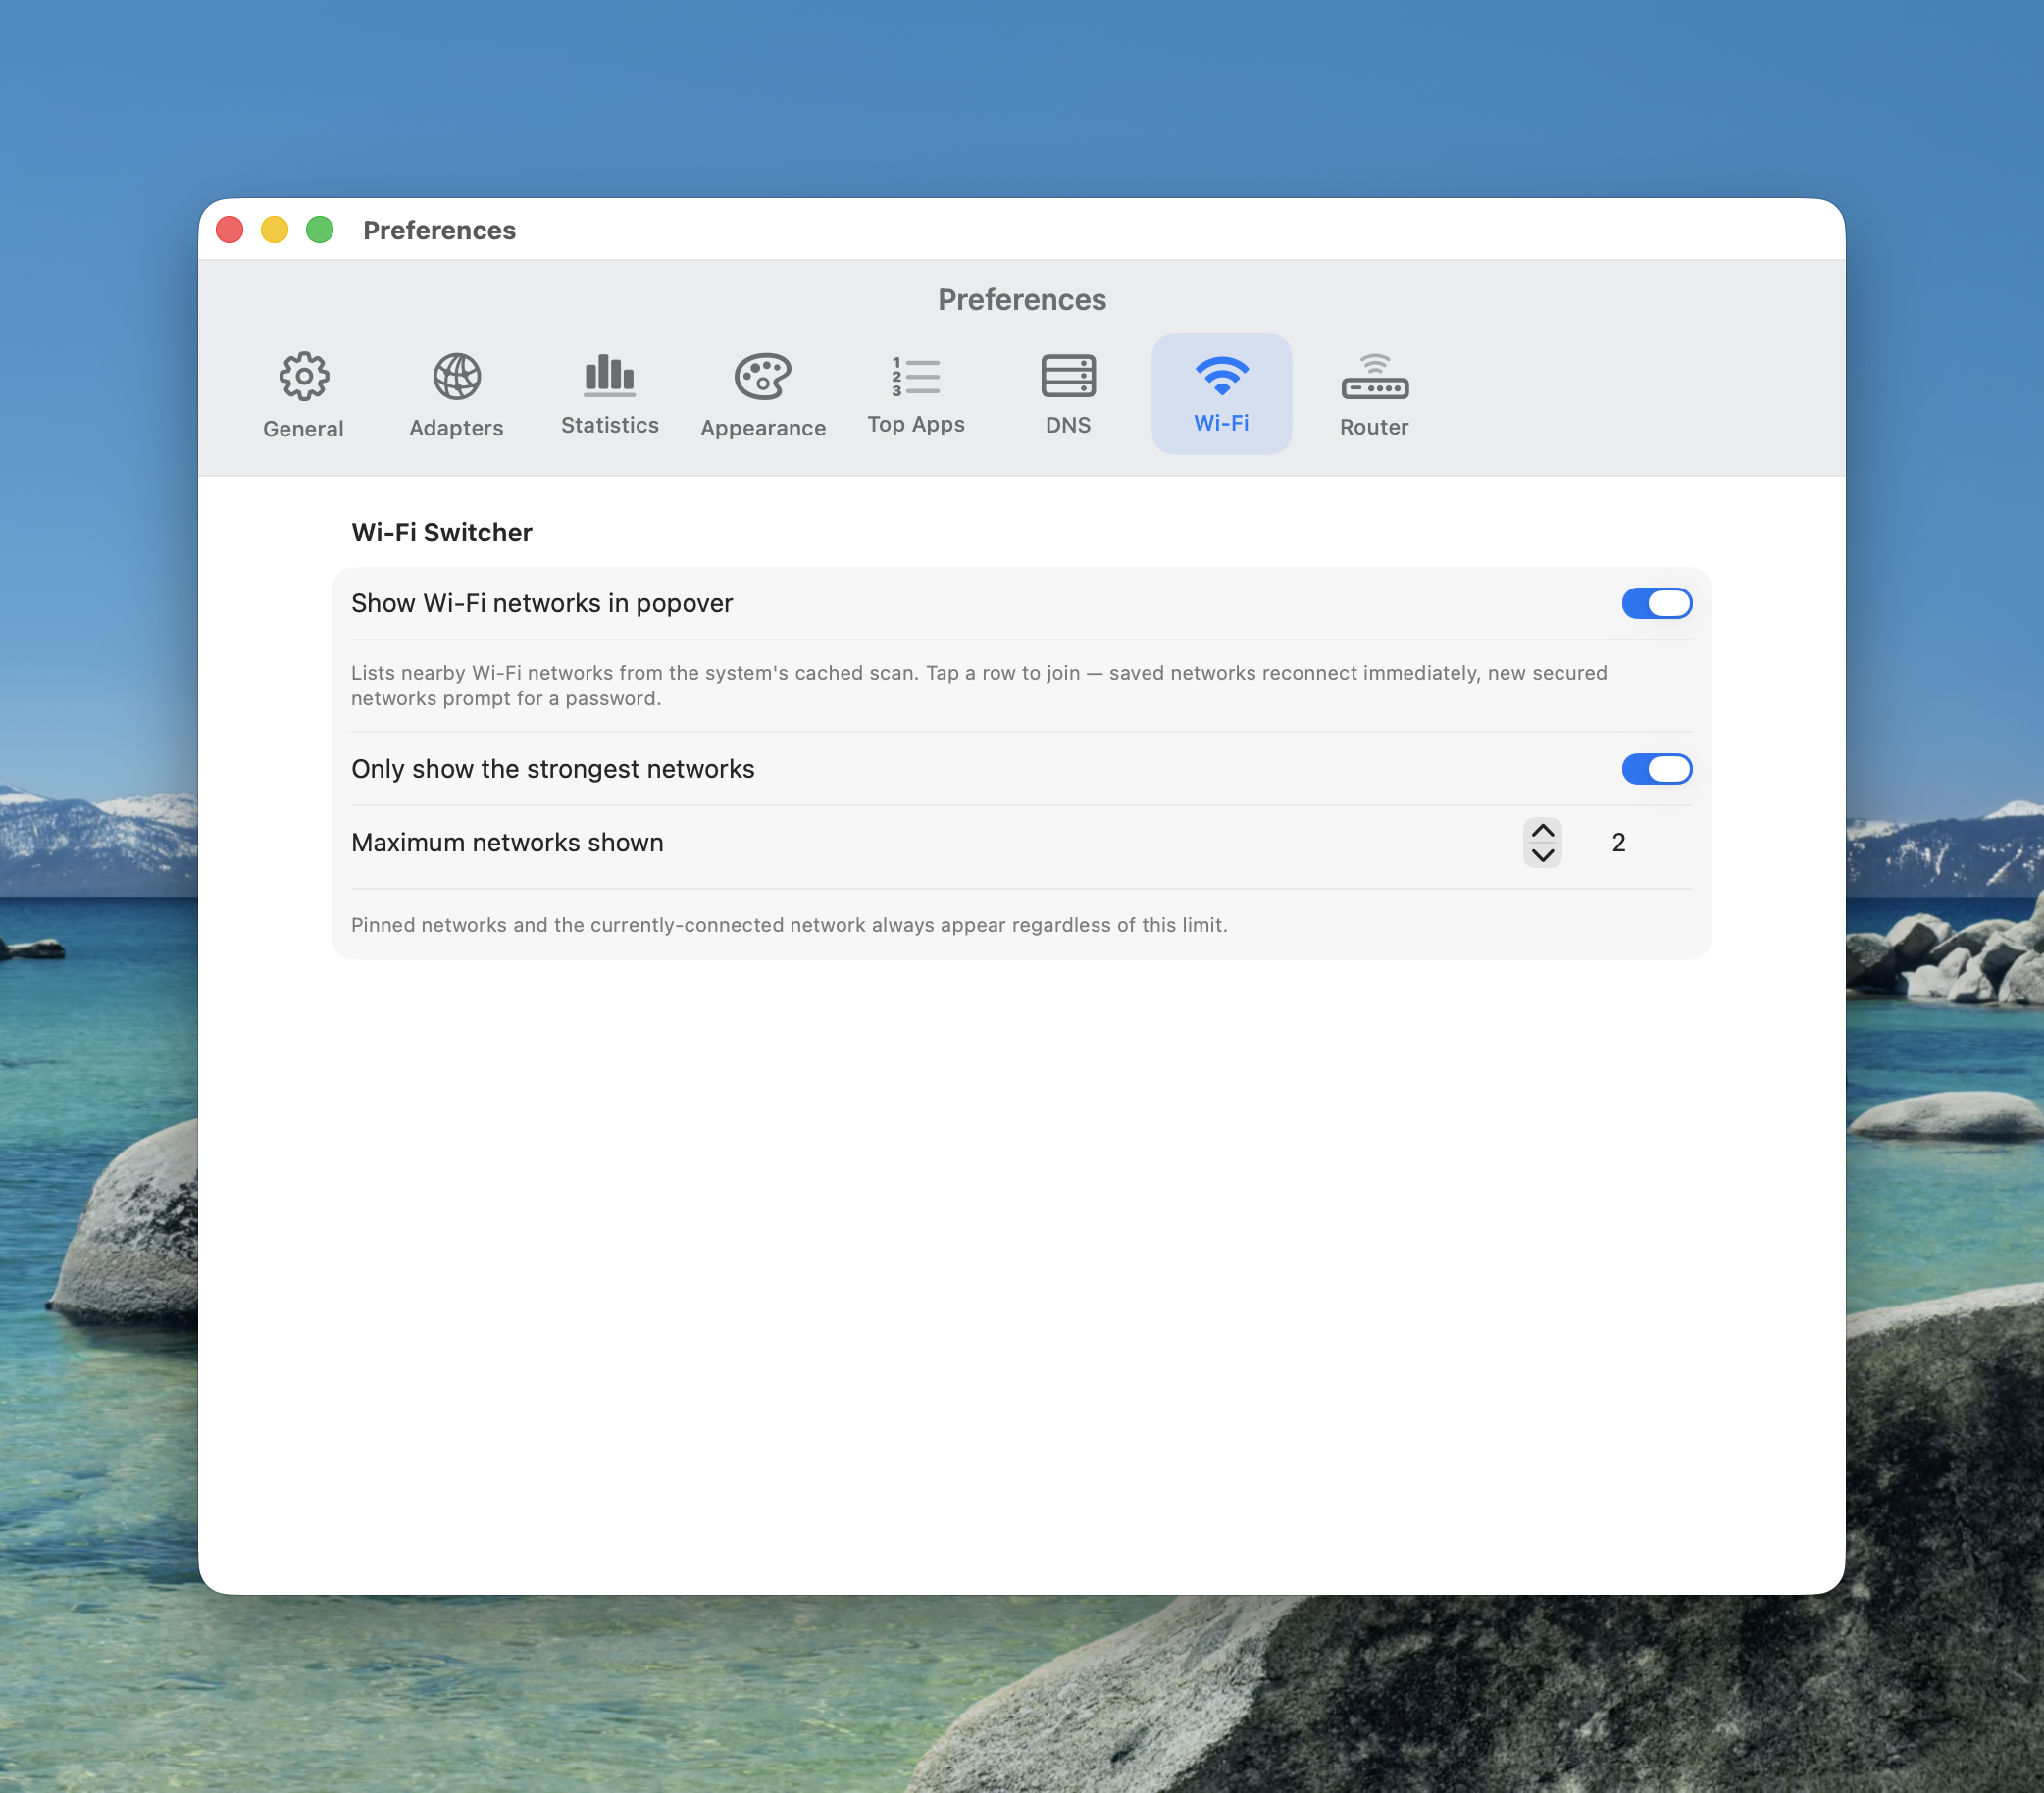
Use the Wi-Fi settings pane to control how Wi-Fi Manager appears and what support features are available. These settings let you keep the popover focused while still exposing the status information needed for troubleshooting.
You can show or hide the Wi-Fi section in the popover, set a strongest-network limit to cap how many nearby networks appear, check whether Location access is available, and verify whether the privileged helper is installed. This makes it easy to see why scanning or password saving may not be working as expected.
Privileged helper
Saving Wi-Fi passwords to macOS Known Networks requires the privileged helper. The helper runs networksetup -addpreferredwirelessnetworkatindex and is installed from the Preferences window.
Once installed, the helper enables password persistence across sessions so macOS can reuse saved Wi-Fi credentials later.